4 Winter-Themed Sensory Bins


If you're looking for something fun to do this winter, I highly recommend these winter-themed sensory bins.Both my children, ages 2 and 5, loved exploring sensory bins and these ones are easy to set up. If you're new to sensory bins (what they are and how to make them), check out this post: https://themontessoriroom.com/blogs/montessori-tips/taste-safe-sensory-bin-fillers
I love them because they're fun and there's so many amazing benefits for children:
- Engage the senses - children develop their sense of touch, sight, sound and sometimes smell (depending on what’s in it).
- Develop and strengthen fine motor skills - exploring with their hands and/or tools
- Language skills - children may want to talk about their exploration and the different things they did, discovered, etc.
- Foster creativity and imagination
- Cognitive development - like problem-solving skills, classification, counting, etc.
- Help with self-regulation - for some children, sensory bins can be calming and help them to self-regulate
A note about safety: Sensory bins often include small, loose parts. Young children should only engage with toys and objects measuring at least 1¼" (3 centimetres) in diameter and 2¼" (6 centimetres) in length to prevent choking. Maintain constant supervision if using loose parts smaller than this.
1. Sensory Bin: 2 Ingredient Fake Snow

Materials to make fake snow:
- Baking Soda
- Corn Starch
- Water
- Large Bowl or you could make it directly in the sensory bin
ORFor a taste-safe option, use:
- rice cereal or crushed white crackers (this is a great way to use up food that’s gone stale)
- Water
- Large Bowl or you could make it directly in the sensory bin
Optional loose parts you can add:
- Twigs
- Acorns & Acorn Tops
- Pine Cones
- Pebbles
- Anything you want to include
Adult Preparation: I would recommend making the "snow" ahead of time. You can make it with your child but be prepared for a little mess as you mix the dry ingredients with the water.Once the sensory bin is ready, put it in an area of the home where it’ll be easy to sweep up any fallen materials. I would not recommend doing it over a carpet.
For option 1:
- Add baking soda and corn starch in a 1:1 ratio to a mixing bowl.
- Slowly add water (you won’t need much) until "snow" is packable.
- Add loose parts to the sensory bin or leave them in a bowl next to the sensory bin
For option 2:
- Add rice cereal or crushed crackers to bowl
- Slowly add water until "snow" is packable
- Add loose parts to the sensory bin or leave them in a bowl next to the sensory bin

Presentation:
You can show your child how to explore the sensory bin or simply put it in an area accessible to your child and invite them to explore independently
Helpful Tips:
- Your child may want to explore the fake snow with their hands and ignore the loose parts entirely. They learn so much exploring with their hands so I would allow this, as long as you’re okay with a little mess.
- Have some cleaning materials nearby, i.e. damp cloth for hands, dry cloth, broom and dustpan to make clean up easier once their play is done.
- If your child is interested, bring a little bag on your next walk and invite them to choose some loose parts from nature they’d like to add to the sensory bin.
Extension Activities:You can use the fake snow filler in many different ways:
- Add small tools, i.e. scoops, small containers, etc. for some open exploration
- Add cookie cutters
- Add Arctic or Penguins Toobs to invite imaginative play

You could also do this with real snow. Real snow makes an excellent filler and adds a scientific component to their exploration because it will eventually melt.
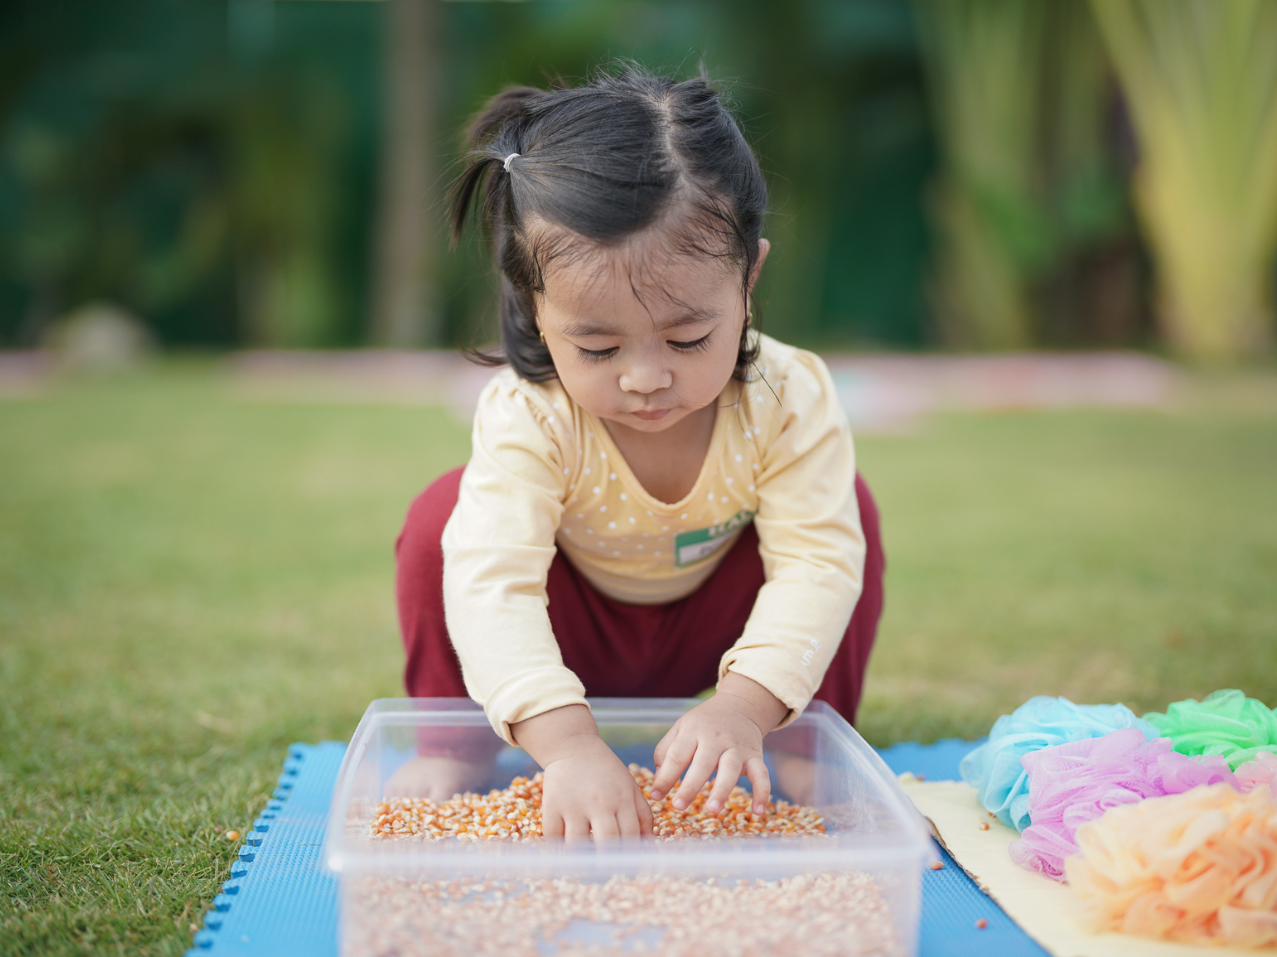
2. Winter-Coloured Rice & Arctic Animals

Materials:
- White & Blue Rice - find a recipe to dye the rice here
- Arctic Toob
- Small Scoops and Bowls
Adult Preparation: Add rice, arctic figurines, scoops and bowls to the sensory bin.
Once the sensory bin is ready, put it in an area of the home where it’ll be easy to sweep up any fallen materials. I would not recommend doing it over a carpet.

Presentation:
You can show your child how to explore the sensory bin or simply put it in an area accessible to your child and invite them to explore independently
Helpful Tips:
- Your child may want to explore the rice with their hands and ignore the loose parts entirely. They learn so much exploring with their hands so I would allow this, as long as you’re okay with a little mess.
- Have some cleaning materials nearby, i.e. dry cloth, broom and dustpan to make clean up easier once their play is done.
Extension Activities:
- Add small tools, i.e. scoops, small containers, etc. for some open exploration
- Add small vehicles or any other small figurines that will invite imaginative play
3. Winter Maintenance

Materials:
- Shredded Paper
- Small construction vehicles
Adult Preparation: Add shredded paper and construction vehicles to sensory bin.

Presentation: You can show your child how to explore the sensory bin or simply put it in an area accessible to your child and invite them to explore independently.
Helpful Tips:
- If you only have larger vehicles, you can do this on a larger scale with a big storage bin. If large enough, you could even invite the child to sit in the sensory bin while they play. Clean up is much easier with this one because it’s just paper :)
Extension Activities:
- Add anything you think will enrich your child’s exploration, i.e. pretend street signs, draw a road on the bottom of the bin, figurines of people, etc.
4. Arctic Animal Ice Rescue

Materials:
- Muffin Pan
- Water
- Arctic Toob
- Eyedroppers
- Small bowl
- Blue Food Colouring - optional
Adult Preparation: I recommend preparing for this sensory bin the night before. Fill muffin pan with water and add Arctic figurines to the water. Put in freezer.
When you’re ready to prepare the sensory bin, add enough water so that the ice will float and a few drops of blue food colouring (optional) to the bin. Put a few of the frozen animals in the bin (for younger children, start with less and add more as they engage with the activity). Put a small bowl of warm water next to the bin with the eyedropper(s).

Presentation:
- Demonstrate how to fill an eyedropper with warm water and squeeze the water over frozen animals. Use two hands and slow movements.
- Draw your child’s attention to the ice melting away from the animal.
- Invite the child to have a turn and explore.
Helpful Tips:
- Have some cleaning materials nearby, i.e. dry cloth, towels, mop, etc. to make clean up easier once their play is done.
Extensions Activities:
For older children, add some salt to the warm water to speed up the melting process. For children old enough to know about road salt, you can further their understanding by comparing it to that process - salt is put onto the road, causing the ice to melt so our tires don't slip.
More winter-themed sensory bin fillers:
- Cotton Balls
- White & blue pom poms
- Dry white beans
- Tinsel


![Kidamento Kidamento Children's Cameras [3 Models]](http://themontessoriroom.com/cdn/shop/products/kidamento-childrens-cameras-3-models-661353.png?v=1699075281&width=1600)
![Kidamento Kidamento Children's Cameras [3 Models]](http://themontessoriroom.com/cdn/shop/products/kidamento-childrens-cameras-3-models-661353_2000x.png?v=1699075281)